Wireless technology has become an essential part of our everyday lives, changing the way we interact with our devices. The comfort of cord-free connectivity has spread to our home and workplace peripherals, with wireless printers leading the way in increasing productivity and versatility. Among the numerous alternatives available, HP printers stand out for their dependability and user-friendly features, making them a popular choice for both personal and business usage.
As we are in a wireless world, we must remain up to date on the newest advances and techniques that may help us simplify our daily lives. One such vital skill is the ability to wirelessly connect an HP printer to a PC. This simple action may have a major impact on your workflow by allowing you to print from anywhere on your network.
In this blog, we’ll walk you through the steps to effortlessly connect your HP printer to your computer without the use of physical cords. In conclusion, you’ll have the expertise to fully utilize your wireless printing capabilities, simplifying your productivity and enjoying the comfort of current technology.
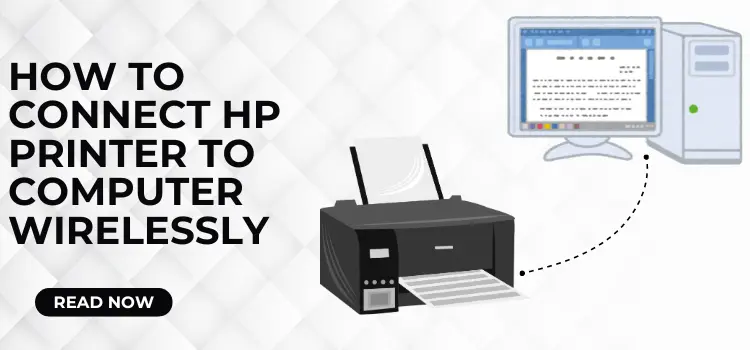
How to Connect HP Printer to Computer Wirelessly?
Wireless printing technology has advanced tremendously, providing consumers with a convenient and efficient printing experience. HP, a printing industry pioneer, offers a variety of models with built-in wireless capabilities to meet both personal and commercial demands. Understanding how to make this wireless connection is critical for getting the most out of your HP printer.
Note: Before you begin printing, ensure that your computer can identify and recognize your printer by going to the Settings box on Windows Devices. Moreover, compatibility and installing the appropriate printer driver are critical for effective printer identification.
For Windows>
In today’s home and workplace situations, connecting an HP printer wirelessly to a Windows PC provides ease and versatility. This procedure allows users to print papers and photographs without using physical cords, which simplifies workplace organization. While the specific procedures may differ significantly based on the printer brand and Windows version, the overall technique is uncomplicated and can be performed in a few simple steps.
- Click the Start menu on your Windows computer.
- Now, navigate to the Settings section.
- Click on the Devices option.
- Select the Printers & Scanners tab.
- Then, click on the Add a printer or scanner option.
- Wait for Windows to detect available printers.
For Mac>
Establishing a wireless connection between an HP printer and a Mac computer streamlines the printing process by eliminating the need for awkward cords. This method, while exclusive to the Apple environment, is intended to be user-friendly and efficient. Users may create a dependable wireless printing solution that boosts productivity in both home and commercial settings by taking advantage of built-in Mac capabilities and HP’s interoperability with Apple devices.
- To connect a printer to a Mac, select the Apple menu.
- Then, select System Preferences from the menu.
- Click on the Printers & Scanners option.
- For adding a new printer, hit the “+” button.
- Finally, choose your printer from the list that appears on your screen to complete the process.
How to Setup HP Printer After Connecting to the Computer?
Setting up an HP printer after connecting it wirelessly to your computer is a critical step in ensuring maximum functioning and performance. This preparation procedure creates the groundwork for a seamless, error-free printing experience. By following the right setup processes, users may maximize the capabilities of their HP printer, allowing for flawless communication between the device and the computer. A comprehensive setup procedure not only ensures successful printing but also gives you access to additional functions and helps you avoid frequent problems that may develop with daily usage.
1. Install The Printer Drivers & Software
Installing printer drivers and software is a critical step in configuring your HP printer. This step gives your computer the tools it needs to efficiently connect with your printer, allowing you to use all of its functions. Proper installation assures peak performance, extensive functionality, and a simple interface for operating your printer. It is the foundation for a smooth and effective printing process.
- First, you have to Download the latest drivers from official website (ensuring they are compatible with your printer model and operating system).
- Then, run the installation wizard by following on-screen prompts.
- Wait to complete the driver installation process.
- Lastly, consider installing HP’s full-feature software suite for advanced functionality like scanning and faxing.
2. Verify The Printer Connection
Verifying the printer connection is an important step in ensuring smooth communication between your HP printer and PC. This procedure ensures that all hardware and software components are correctly connected and functional. A comprehensive connection verification helps to avoid possible printing difficulties, saves time troubleshooting, and sets a solid foundation for all of your printing needs. It is a necessary step toward effective and trouble-free printing processes.
- Verify the firmly attached state of all wires, and for wireless printers, establish a stable Wi-Fi connection.
- Second, make sure the printer is switched on and ready.
- To identify and configure the device as the default printer, use your computer’s printer settings.
3. Create a Test Print
Running a test print after connecting your HP printer to your computer is an important troubleshooting step. This straightforward yet effective procedure allows you to test the printer’s performance, evaluate print quality, and discover any potential problems. A test print is a useful approach to confirm proper communication between your computer and printer, giving you confidence in your setup before proceeding with more sophisticated printing chores.
- Print a test page from your computer’s printer settings menu to ensure good communication and printing quality.
- Furthermore, check the test page for any problems with ink dispersion, alignment, or paper feed.
4. Align The Printheads & Calibrate
Print head alignment and calibration are crucial maintenance procedures for HP printers that have a major influence on print quality. These techniques assure exact ink placement and color fidelity, yielding crisper lettering and more colorful visuals. Regular alignment and calibration assist in avoiding common printing errors, improve the life of your printer, and provide consistent, professional-looking output. Understanding these processes is critical for achieving peak printer performance.
- Access the printer’s maintenance menu using either the on-device controls or computer software.
- Then, execute the alignment and calibration steps to achieve the best print quality and accuracy.
5. Configure Printer Settings & Update Firmware
Configuring printer settings and upgrading firmware are critical stages in improving your HP printer’s performance. These steps guarantee that your device runs smoothly and securely, suited to your unique requirements. By fine-tuning settings and updating firmware, you may improve print quality, gain access to new features, and handle potential difficulties. Taking the effort to correctly configure your printer ensures a better, more consistent printing experience.
- Adjust the default paper size, print quality, and color options to reflect your regular usage.
- Set up any network-sharing settings if you intend to use the printer with numerous devices.
- Check for and install any firmware updates for your printer model.
- These updates frequently enhance speed, introduce new features, and resolve security concerns.
Read Also:- How to Connect HP Printer to Wi-Fi
How to Fix HP Printer Unable to Connect With Computer?
Poor network connectivity, improper printer settings, or Windows updates are the most common reasons why your computer may be unable to connect to your HP printer. To address the issue, follow the procedures provided below.
- Try restarting your printer and computer to resolve any errors.
- If you’re using a network printer, restart your router.
- Before you begin, ensure that your printer is connected to the Wi-Fi network; if so, unplug your computer from the network.
- Reconnect it to the same network as your printer.
- Check to see if the Wireless light on the Control Panel is solid blue; if so, the problem has been rectified, and you may now have a seamless printing experience.
End note!
To summarize, connecting an HP printer wirelessly to your computer, whether Windows or Mac, provides substantial benefits in terms of ease and workplace efficiency. You may establish a stable wireless printing connection by following the manufacturer’s instructions and using the built-in features of your operating system. This configuration not only minimizes cable clutter but also allows printing from numerous devices on your network. As technology advances, wireless printing solutions are anticipated to become more smooth and user-friendly.
In a scenario, if you’re still unable to connect your wireless HP printer to your computer, then get in touch with our experts by dialing the HP printer support phone number. Experts are readily available 24/7 to attend to your calls and assist you with the right feasible solutions. So, don’t wait and get in touch now.
Frequently Asked Questions (FAQ’s)
1. Do all HP printers support wireless connectivity?
A: No, only printers that are labeled as “wireless” or “Wi-Fi enabled” support the wireless connectivity feature. It’s important to check the specifications of your HP printer to confirm if it has the feature to connect with the computer wirelessly.
2. How long does the wireless setup process take?
A: The entire wireless setup process of any HP printer usually takes between 5 and 10 minutes. However, the time may vary depending on the specific printer model and the computer’s operating system.
3. How can I reset the wireless settings of my HP printer?
A: To reset the wireless settings of your HP printer, navigate to the control panel settings, choose the reset option, and then click on the reset network settings option.